Sunday, April 28, 2013

Chocolate Parisian Macarons

After making ice cream last week, I had egg whites left over. Instead of using them in something easy that I'd done before (like meringues or pancakes), I decided to make macarons. I thought, "how hard can it be? it's just two meringues with some frosting in the middle, right?" I wasn't entirely wrong, though macarons are a beast all their own. My first clue that I was getting in to something complicated was when I realized my entire cookbook-bookcase did not have a single recipe for Parisian macarons. Then searching the internet yielded relatively few results, and several bloggers warning fellow foodies of the subtleties in the technique for making macarons. I decided to follow the advice of David Lebovitz. Here is his recipe (doubled):

Chocolate Macaron Batter
2 cups Powdered Sugar
1 cup Almond Flour
6 Tbsp Dutch Cocoa Powder
4 Large Egg Whites
1/2 cup + 2 Tbsp Granulated Sugar

First take the egg whites out of the fridge so they can warm up to room temperature, and preheat the oven to 350F.


Almond meal or even almonds ground up in a food processor will work if you can't find almond flour. Sift the Powdered Sugar, Almond Flour, and Cocoa Powder into a bowl. 


I used Bob's Red Mill Almond Flour, which contained some bits that were impossible to work through the mesh strainer that I use as a sifter.


So I used a coffee grinder to grind up the bits that refused to go through the mesh, after which, they went through just fine.


Next I started whipping the egg whites in my trusty vintage Hobart-Kitchen-Aid mixer.


While the eggs whipped, I got a few things ready: a half-sheet-pan with a Silpat (parchment paper can be used if you don't have a Silpat), and piping bag.


When the eggs had reached the stage of soft peaks, I started to slowly add the granulated sugar.


Let the eggs and sugar beat together on high speed for a few minutes until stiff.


Then start to gently fold in the powdered-sugar/almond-flour mixture in two parts.


Now you're ready to start piping! Here are a few tricks to make your life easier:

1) Plug up the tip by stuffing some of the pastry bag into it. This way you wont have batter oozing out the end  as you're trying to fill it.


2) Make a "C" with your non-dominant hand and fold the pastry bag over your hand, so you can hold the bag as you fill it, and then you can use your "C"-hand as a ridged surface to scrape the spatula against -- keeping everything neat and tidy, inside the pastry bag!


When the bag is full, twist off the top so it's tight, then unplug the tip and start piping!


For macarons, I pipe perpendicular to the pan.


My piping skills are far from excellent...


I let these bake for 15 minutes in the middle of the oven, then I rotated them and let them bake for a few more minutes before taking them out to cool.


While my macaron cookies cooled, I worked on the filling:

Chocolate Ganache
1/2 Cup Heavy Cream
2 tsp Honey
4 oz. Bittersweet Chocolate
1 Tbsp Unsalted Butter

This isn't exactly the recipe I used, but rather the recipe I should have used. I doubled this recipe and ended up with way too much left-over ganache (mmmm left-over ganache!). Also, I used unsweetened chocolate, which meant I ended up throwing in a handful of sugar, some extra honey, and a splash of vanilla to make it edible. All of this, plus my lack of diligent stirring while I was trying to take sexy action photos for this blog post lead to a broken ganache - meaning the fat separated out resulting in a grainy chocolate lumps drenched in greasy fat. I was able to mostly rescue the ganache by taking out a a few tablespoons, re-melting it, stirring like crazy, then adding this back to the broken ganache and stirring like crazy again. Lesson learned - when making ganache, stir like crazy until you're absolutely certain it's stable!

Anyway, here's how to make ganache: Chop up the chocolate.


Bring the cream and honey to a boil, then turn off the heat and add the chocolate.


Let it sit for a few minutes, then stir the chocolate, milk and honey together.


Then add the butter. (you can begin to see the grainy/broken texture of my ganache here!)

STIIIIRRRR!!! Here's my ganache after I saved it from breaking:


Once the ganache is completely cooled, I spread it between two cookies to make a macaron!


These little guys aren't perfect, but they sure are deliciously chocolatey!

Monday, April 22, 2013

Dark Chocolate Strawberry Ice Cream

6oz. Scharffen Berger bittersweet chocolate
1/3 cup Dutch cocoa powder
2 cups cream
1 cup milk
2 tsp vanilla
4 egg yolks
3/4 cup sugar

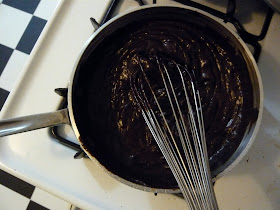
Melt the chocolate in a barely simmering double boiler:


Combine the egg yolks and sugar in a metal bowl. Whip them until smooth and light-yellow:


In a sauce pan, combine milk, cream, vanilla, and cocoa powder, bring to a boil and immediately remove form heat (watch it closely and keep a spoon or whisk handy to stir it to keep it from boiling over!)


Add a splash of the the hot cream/cocoa to the egg/sugar bowl while stirring the eggs. The rest of the hot cream/cocoa can be added to the eggs slowly with plenty of stirring to ensure that the eggs don't get scrambled! Once all the cream/cocoa is incorporated, add the melted chocolate and whisk it all together until it is evenly combined.


At this point I put the bowl in the freezer, but it could also be left in the fridge for several hours. The point is to cool this pre-ice-cream soup as much as possible without freezing it, yet. When I put it in the freezer, I keep an eye on it, stirring ever 5-15min to make sure it's not freezing and cooling evenly.


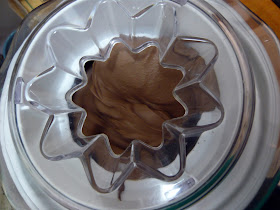
Once it feels cold to the touch, but is still liquid (a very thick liquid in this case!) it can be transferred to an ice cream maker! The bowl of the ice cream machine must be frozen at least 12 hours prior to making ice cream! I just keep my bowl in the freezer so it's ready to use whenever the mood strikes me. Also, make sure the paddle is in the bowl before your pour the ice-cream-soup in because the soup will freeze upon contact with the bowl making it almost impossible to insert the paddle afterwards!

(I totally recommend this CuisineArt Ice Cream Maker!)

After about half an hour, it will look like soft-serve ice cream. This means it's done!


This is also the time to add things like syrup, chocolate chips, cookie crumbles, or fruit. In this case, I used diced strawberries:


As soon as all the strawberries were in, I turned it off and then worked quickly to get the ice cream out of the machine, into a bowl, and into the freezer. Ice cream can be eaten immediately out of the ice cream maker, though it is very soft. I recommend freezing it further in the freezer. 


This ice cream turned out to have a super rich, bitter, dark-chocolate flavor punctuated with bits of frozen strawberry. If you're a fan of sweeter milk-chocolate, some extra sugar should be added to this recipe. The texture is interesting, almost more like a very cold mousse rather than ice cream. I'm suspicious this texture might come from whipping the eggs and sugar together. I usually just mix the eggs and sugar until they're evenly combined, but no whipped. I got the idea to whip them this time from a chocolate ice cream recipe I found elsewhere on the internet. Anyway, this ice cream is still totally delicious!

Sunday, April 21, 2013

Pork Chops with Strawberry Salsa and Yam Fries

Alex and I have been on a roll coming up with excuses to use fruit in a savory way. Yesterday we got some pork chops form Prather Ranch at the Grand Lake Farmers Market, and this is what we ended up making...

All good things begin with sauteed onions and garlic!


Onions and garlic we removed from the pan to make way for the chops! We seared these until they were well browned or even slightly blackened in a few places.


We made a sauce in the bottom of a baking dish with a big drizzle of molasses (maybe a Tbsp?) and about a 1/4cup or so of apple cider vinegar. This is where the sauteed onions and garlic went to make room for the pork chops in the pan. Then when the pork chops were thoroughly seared, they too were moved to the baking dish.


Then the pan where the onions, garlic, and pork had been was deglazed with some water, once the pan was deglazed, the liquid was also poured into the baking dish. Chopped carrots and half a diced apple were also added to the baking dish...


Then it was wrapped in foil in put in a 350F oven with the yam fries.


To make the sweet potato fries, we simply sliced some yams, tossed them with Portuguese olive oil, salt, and spread them out on a baking sheet.

Before:

When baking fries, they need to be stirred/flipped to ensure even cooking.

After: 

While everything was in the oven, I made a strawberry salsa:

1/2 pint of strawberries, diced
1/2 bunch of cilantro, chopped
1/2 bunch of green onions, thinly sliced.
1/4 Fugi apple, diced
juice from half of a tiny lemon (maybe a tsp of juice)
pinch salt


This turned out to be kind of a ridiculous amount of food, but it was soooo delicious!

Strawberry Cilantro Pasta

It all began with sauteed red onions, garlic and ground beef. And it was finished with halved strawberries, a bunch of chopped cilantro, half-a-bunch of thinly sliced green onions, dry ground fennel, cumin, salt, and some left-over cooked pasta. Delicious!


Thursday, April 11, 2013

Orange-Fennel Beef & Rice

Today's post is brought to you by the color orange!


...Also the fruit, orange. I started out with with vague idea of orange & beef and rice-based one-pot meals like jambalaya or paella. I was also excited to use these super flavorful, extremely colorful carrots we got at the farmers market!


On the stove, I began by browning some ground beef.


Then I added onions, carrots, and garlic. Sauteed these all together until they were beginning to brown. I quickly added a cup of rice, stirred it in, and de-glazed the pan with two cups of water. Then I added both juice and zest from one orange... 


And some freshly grated nutmeg.


I let this all simmer until the rice was tender and the liquid was nearly gone (As it cooked I keept an eye on it to make sure it always had plenty of liquid, adding water as needed). When the rice was tender, the flavor still wasn't quite right. So I grabbed Alex to get his opinion. He had the brilliant idea of dried fennel, maybe a teaspoon or so. Then we added a dash of cumin, salt, and cilantro and ended up with a fruity delicious beefy rice dish!