Showing posts with label Appetizers. Show all posts

Wednesday, March 5, 2014

Scallion Pancakes

I fell in love with scallion pancakes in high school, when me and my black-clad anarchist buddies would frequently pile into a quaint little vegan Chinese restaurant in the middle of a small strip mall. If you ever find yourself at the heart of Silicon Valley, I highly recommend you stop by Garden Fresh for some scallion pancakes and lettuce cups.

My quest to make scallion pancakes began with a revelation about dough, thanks to The Food Lab. Scallion pancake dough is a type of laminated dough, like croissant dough. It's characterized by alternating layers of fat and flour. However scallion pancake dough is an order of magnitude easier to make than croissant dough!

Scallion Pancakes
2 cups Flour
1 cup Hot Water
1 bunch Scallions (or your favorite herb)
Salt
Vegetable Oil
Extra flour for dusting

Heat up some water to just below boiling and add it to the flour. Hot water breaks most of the gluten chains, resulting in a soft, supple dough. Mix the flour and water together, knead it a little bit till it's smooth. If it's sticky, add some more flour, a little bit at a time. 


Form the dough into a ball, and then cut it into quarters. 


Set three of the quarters aside and roll out one quarter into a thin rectangle.


Brush some vegetable oil on the dough. The first time I did this I used canola oil, and the second time I used grape seed oil. Both worked great, but I'm starting to fall in love with the subtly sweet flavor of grape seed oil. Sesame or peanut oil would also be great.


Sprinkle salt and chopped herbs on top of the oiled dough. Scallions have been absent from the farmers market lately, so I used cilantro the first time and chives the second time. I think you really can't go wrong here. I'm excited to try adding some edible flower petals in addition to herbs!


Once you've made your filling, roll up the dough.


Then roll up the rolled dough.


Pinch it closed and roll it out with a rolling pin into a circle that is few millimeters thick. It helps to begin by sort of folding the loose end under the dough with one hand, while the other hand squishes the dough flat. Then use the rolling pin to finish it off. This way you wont have that loose end dangling around messing up the symmetry of your perfect circle! Move the pancake to a pan lined with parchment paper or dusted with flour while you work on the remaining three pancakes. (This recipe makes four pancakes)


To cook the pancakes, heat up some oil in frying pan on medium to low heat (my stove runs hot, so I use the lowest possible setting). Use just enough oil to cover the bottom of the pan!! The first time I made these they cooked a little unevenly, so I figured the second time I should use more oil to allow for more even cooking. This creates a potentially dangerous situation as you're trying to flip pancakes in a pool of hot oil... Especially if you're really foggy from a head-cold and rushed to get the pancakes done before a potluck that you're already running late to. Needless to say, I splashed frying oil in my face the second time I made these. Luckily, my reflexes were quick, my eyeballs are fine, and I've had sunburns worse than this. My first thought was "jeez, in all my years of cooking, professionally or not, I've never done something this stupid!" Though, that's not true. Cooking is dangerous, folks! Be conscious of what you are doing!! In all my years of cooking, I've cut and burned myself more times than I can count. Every time I've hurt myself in the kitchen, it's been because either I was in too much of a hurry, or my knives needed sharpening. So keep your knives sharp, and take the time to get your mise en place in order so that even if you do have to move faster than you can think, you're set up for success. 

Anyway, fry the pancakes on both sides until they're golden brown, and just barely beginning to blacken in a few spots. They're best eaten immediately, but they're still just as delicious reheated later.


Saturday, November 30, 2013

Thankful

It's been one hell of a year and I've got a lot to be thankful for. Thanks to YOU for reading my blog! I'm consistently flattered to hear of friends and strangers who find inspiration in my posts, and you inspire me to craft the best posts I possibly can. I'm glad I can simultaneously archive my recipes and share them with you - and because of you, this archive is becoming something I can actually be proud of. Thanks, guys.

Enough with the mushy holiday feelings - let's get cookin!


----- LAMB -----

Since moving to Berkeley last year, I've only ever bought meat at the farmers markets. Primarily from Prather Ranch. For Thanksgiving this year, I procrastinated too long and Prather was sold out of all the special holiday meats by the time I asked. They recommended Marin Sun Farms, which has a butcher shop in the Rockridge area of Oakland. Their website is super groovy and they claim to be conscious stewards of the land, raising deliciously sustainable animals. So I made the trip down to Rockridge.

Marin Sun Farms Butcher Shop is in the back of Rockridge Market Hall - A glorious food menagerie, reminiscent of DeLaurenti in Pike Place Market.  I traversed the jungle of imported fine cheese samples, locally carved wooden kitchen utensils, fine wines, and fresh/live seafood. Joy washed over me as I stepped into the Marin Sun Farms corner of the hall - so much beautiful meat! Sausages hanging from the ceiling, coolers full of dog food and stocks, an employee skillfully breaking down an entire lamb in plain view, sweatshirts that simply say "CARNIVORE" on the back, and they have a map detailing where all of their meat comes from and how it gets to the butcher shop (via processing facilities etc., all in CA). Even the employees seemed to be thrilled to be there (always a good sign of a good business).

When I asked the young gentleman behind the counter for a whole leg of lamb, bone in, horror flashed across his face as he told me it would be about 10 minutes. He pulled a full lamb leg from from the walk-in and got a few cuts into it before a salty old man scooped up the lamb leg and ushered the kid to the back. I sneakily watched the older man teach the young guy how to prepare a leg of lamb. This warmed my heart so deeply and brought back many fond memories from when I was learning to be a butcher (though I never truly was). 


Once I had the leg in hand, I had to contact my friend, Trevor, who makes the most amazing lamb I've ever had - lovingly dubbed, "blam lamb". Trevor inspired me to used spices - like cinnamon and coriander, in addition to herbs.


I made a mixture of salt, black pepper, Ceylon cinnamon, and fresh ground coriander. Then I lathered the leg of lamb in olive oil and the spice mixture. To sear this beast, I put a sheet pan directly over two burners on my stove and added some extra olive oil. Searing happens quickly on high heat. A roasting pan would be far better, but sometimes you just gotta work with what you have!


I turned off the heat, removed the meat from the sheet pan and lined it with a bed of onions, garlic, parsley stems, and a bay leaf.


Then I laid the lamb on top of the veggies, sprinkled on the excess spice mix and put it in the oven. After I got it into the oven, I added about a quart of water and a few cubes of frozen homemade chicken demi-glace. Then I covered it with foil and let it braise for 5 hours at 325F.


Before removing this beast from the oven, I carefully poured off most of the drippings into a pot, which I put on the stove to boil down into concentrated deliciousness. 


Since we were biking to our friends house for a Thanksgiving potluck, I deboned and sliced up the entire leg and crammed it into a tupperware. Then at our friends house, I spread the lamb out in a baking pan, covered it in the pan drippings (transported in a ziplock bag), and reheated it in the oven.


Lots of chopped parsley for garnish!


To recap...
Braised Leg of Lamb
1 Whole Leg of Lamb, bone in (7-8#)
~couple Tbsp Kosher Salt
~1-2 tsp Black Pepper, freshly ground
~1 Tbsp Ceylon Cinnamon
~1 Tbsp Coriander, freshly ground
Lots of Virgin Olive Oil
2 Onions, sliced (1 red, 1 yellow)
2 bulbs Garlic, whole cloves
1 bunch Parsley (stems for braising, leaves for garnish)
1 Bay Leaf
1 quart water/stock
....
Rub meat with spices, sear on high heat, put lamb on a bed of veggies with stock, cover with foil or lid, and braise at 325F for at least 4-5 hours.


----- CORN DOGS -----

I'm not sure why I got inspired to make corn dogs, it just seemed like the right thing to do. I adapted the following recipe from Saveur

Corn Dog Batter
1 cup Flour
2/3 cup Cornmeal
1 tsp Baking Powder
1/4 tsp Baking Soda
Big pinch salt
3/4 cup Whole Milk
1/2 cup Buttermilk
1 Large Egg

Mix together the dry things, then add the wet things and thoroughly whisk together.


Prepare the sausage! I used Prather Ranch's Apple Bacon Sausage, cut into bite-sized chunks.


Meanwhile, have a pot of vegetable oil heating on the stove. I usually set it to low heat and test if it's ready by sprinkling a tiny bit of flour or batter into the oil. If it bubbles, it's ready. Dust the sausages in flour, shake off excess flour, then dip them in the batter, and then carefully transfer them to the hot oil. A fork works well for dealing with battered sausages.


Fry for several minutes until golden brown. Use tongs to make sure they are cooking evenly and not sticking to the bottom of the pan.


Any left-over batter can be fried alone. I added some cornmeal to the left-over batter before frying it to make hushpuppies.


Corn dogs on the left, hushpuppies on the right.


----- THANKSGIVING ETC. -----

This is when I began taking photos rather sporadically. I completely forgot to photograph my steamed artichokes and lemon beurre blanc. Here is the only photo I have of Alex's deliciously colorful salad:

Kale, Chard, Chioga Beets, Yellow Beats, Apple, Pear, Ceylon Cinnamon

Believe it or not, in two normal-size backpacks we fit: an entire leg of lamb, pan drippings, corn dogs, salad in a fancy salad bowl, a bowl of parsley, four artichokes, lemon beurre blanc, a six-pack + a 22oz. bottle of beer, and Cards Against Humanity (including 3 expansions). Luckily we only had to do this for a short bike ride.

We arrived at Kate's house, and walked into the most chaotic deliciousness I've ever experienced. Every surface in their sizable kitchen was being used to prepare food. There was food stacked on top of food, and food being "set aside" inside the cabinet next to the plates. There were at least 3-5 people in the kitchen at all times - cooking, chopping, heating, eating, moving, cleaning, prepping, yelling, laughing, and calling for another stick of butter. So much butter. 

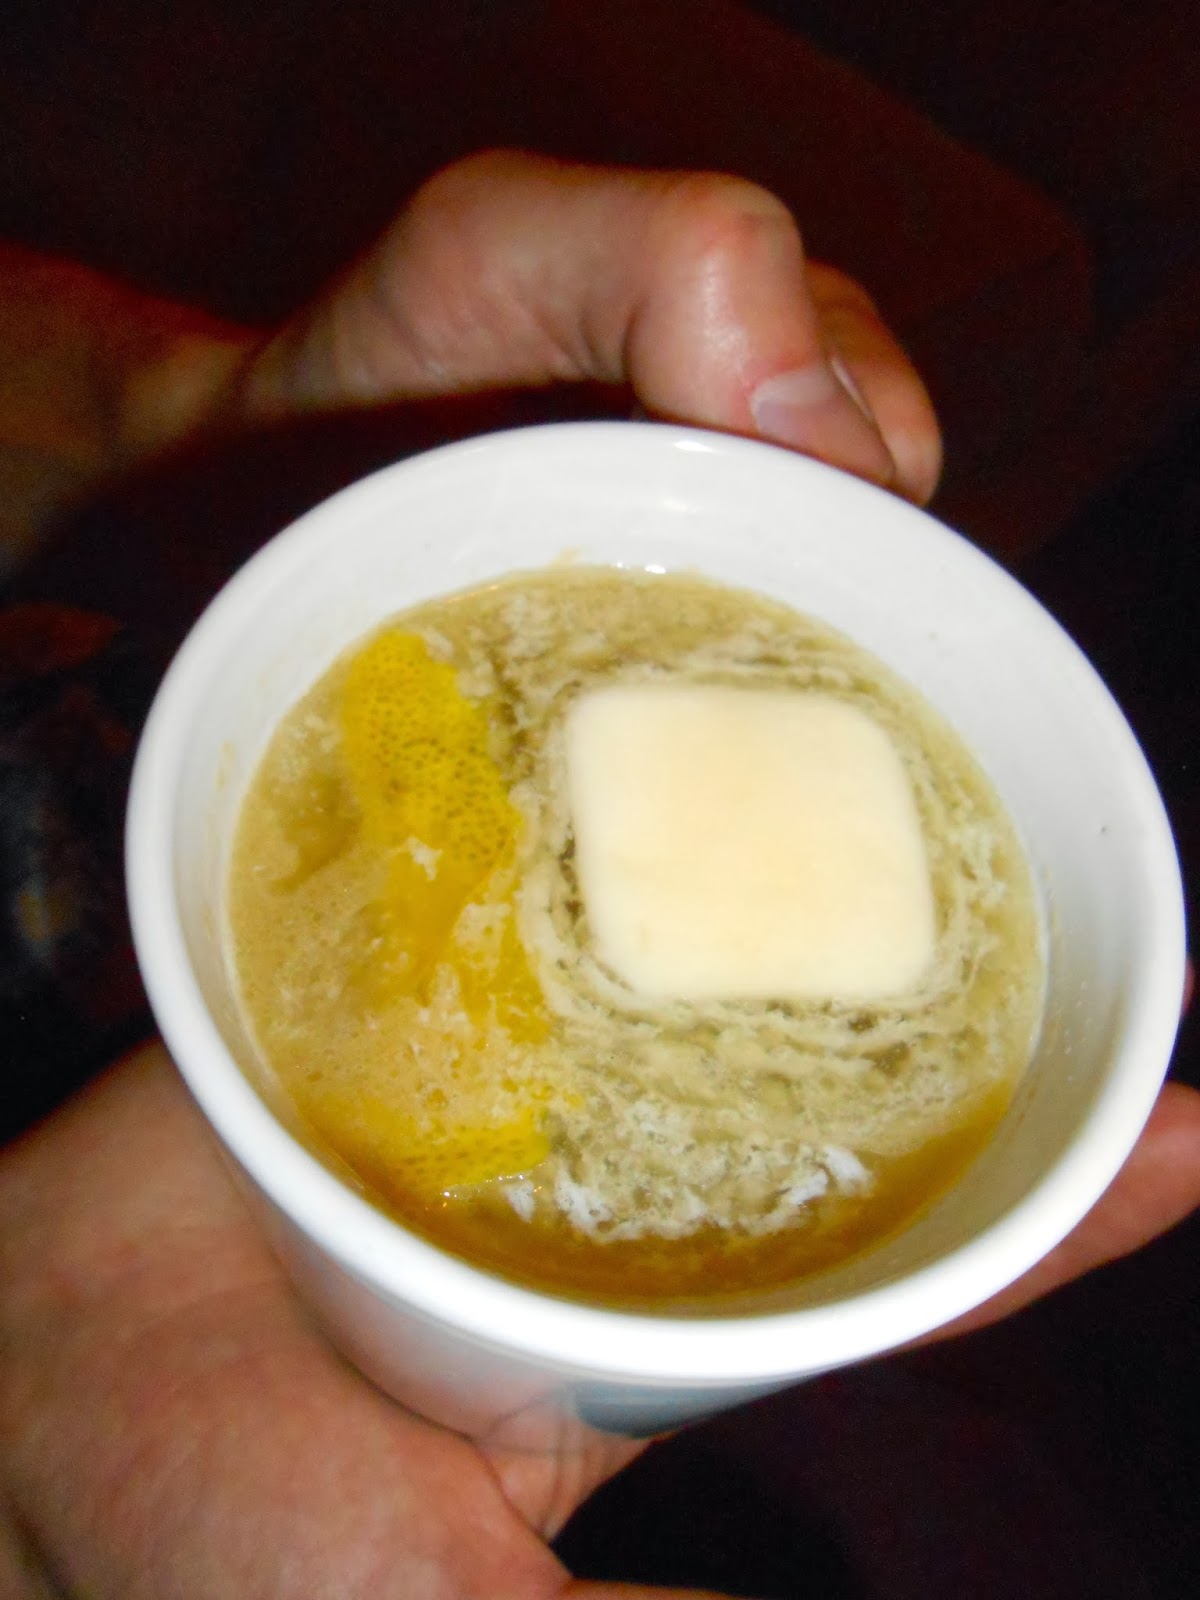
Kate made each one of us a damn fine hot buttered rum. Each with our own tablespoon of butter.


We snacked on corndogs and artichokes and played a silly role playing game called Munchkin.

And then there was duck. 

One of Kate's housemates got two ducks from the same producer that The French Laundry goes through. He made confit with the legs and sous-vided the breasts. There were so many of us that we only got a few bites of duck, but oh my, it was divine.

After the duck, we filled up our plates with the next round of food...

Clockwise from about 10-11 o'clock - Gavin's yorkshire pudding, Alex's salad, Ben's cinnamony sweet potatoes, Kate's brussel sprouts, turkey leg, cranberry sauce, mashed potatoes #1, Aaron's matzo stuffing, Justin's mashed potatoes.

And then there was lamb, and sweet potato pie complete with marshmallows on top, apple pie, pumpkin pie, whipped cream, bread pudding, and last but not least, Angus's fairy cakes:


I'm likely forgetting something. There was an unbelievable amount of food, and I think we may have somehow ended up with more food than we began with. Thanks for all the delicious food, good times, and mountain of left-overs! ...and thanks for reading ;-)


Sunday, March 3, 2013

Avocado Adventure!

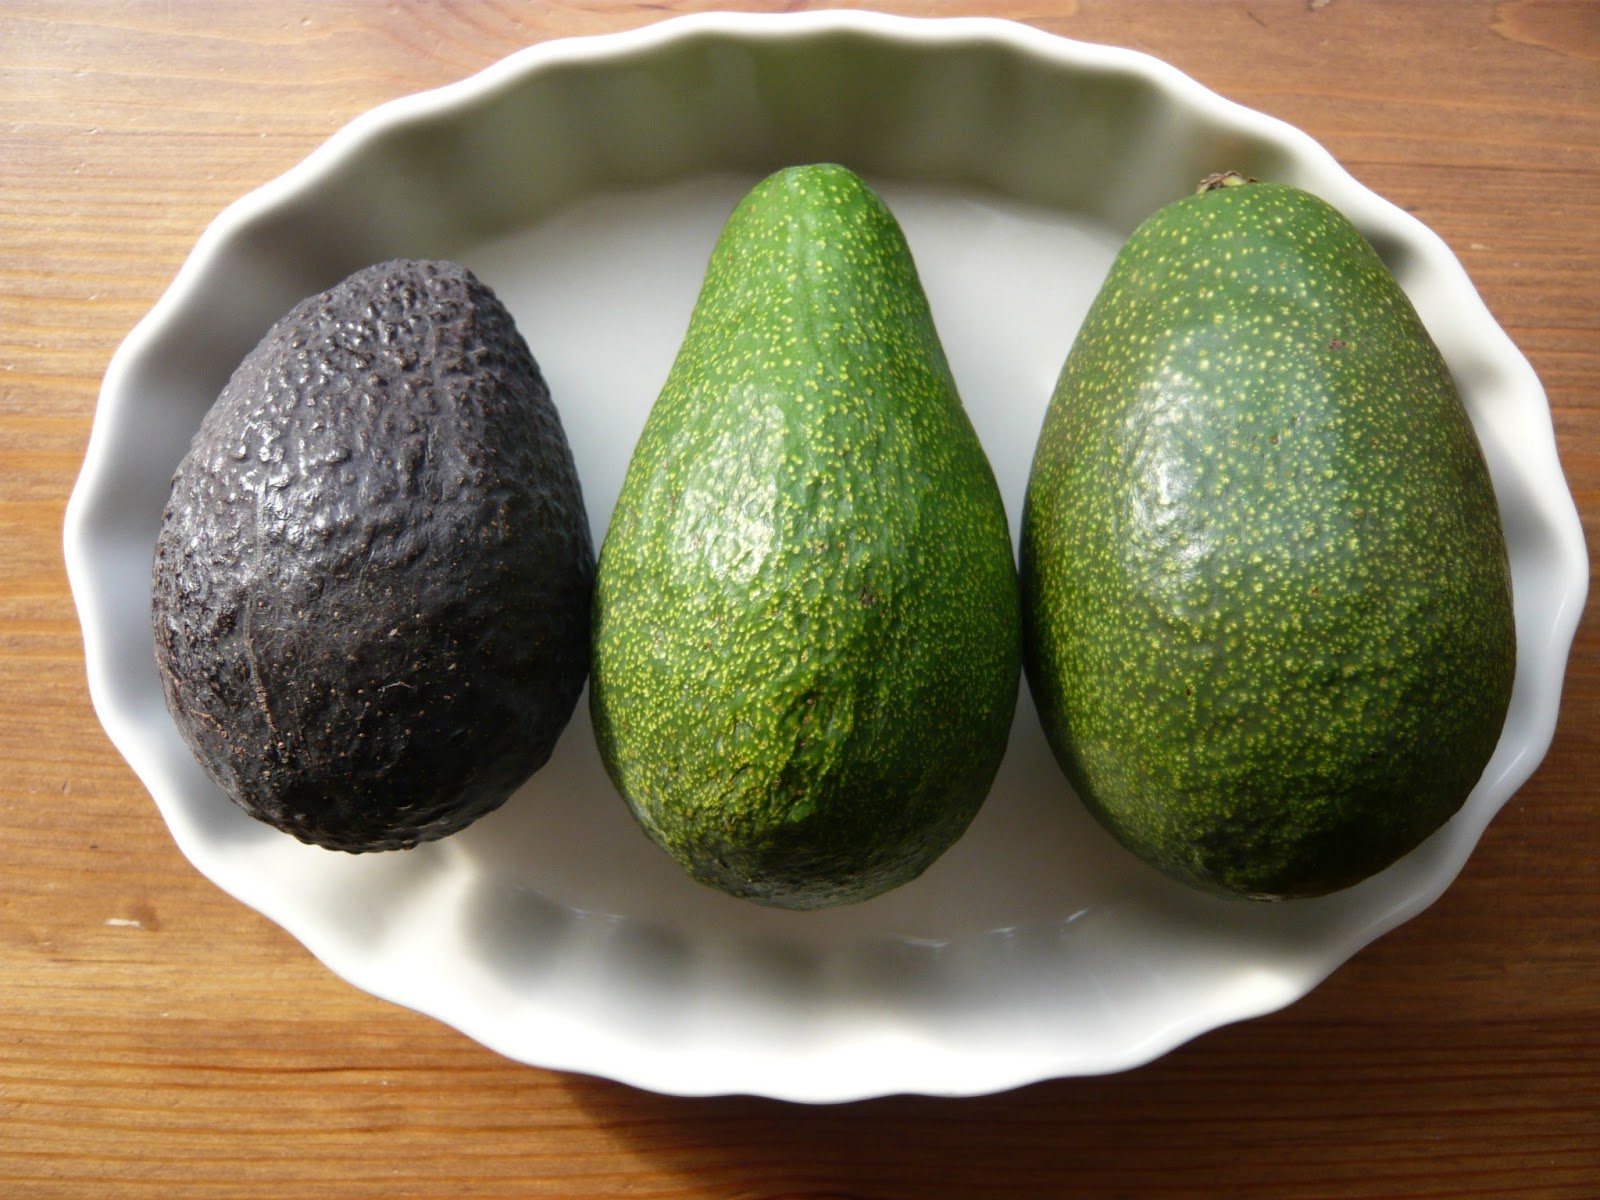
Haas, Fuerte, and Bacon Avocados

Since moving to California, Alex and I have become aware that there are different varieties of avocado. And today, we decided to have a little avocado tasting. We bought three different varieties at the farmers market; the usual black-skinned Haas, green-skinned Fuerte, and green-skinned Bacon. Both Fuerte and Bacon are green when ripe, unlike Haas which is green at the start and turns dark-brown/black as it ripens. Here are our conclusions:
  • Haas: Arguably the most flavorful, with more of a "green vegetable" flavor and firm butteriness. Rich green-yellow flesh and thick skin.
  • Fuerte: Arguably has just as much flavor as Haas, though it's sweeter and creamier. Thin skin with green flesh.
  • Bacon: Despite its name, this was the most disappointing - it was like silky smooth avocado water. Lightest in color and flavor. Also incredibly thin-skinned. 
Granted, this study has a sample size of 1, so we really can't say anything quantitative. Though I'll take a Haas or Fuerte avocado any day!


Saturday, November 24, 2012

Roasted Garlic Scones

I swear if it weren't for my culinarily inclined department I would have nothing to post on my food blog during this first year of grad school!  A grad-student club, the Plant Student Group hosted a Garlic Festival a few days ago. Considering I have a garlic plant tattooed on my back, I felt rather obligated so show up.


At the last minute, I decided to attempt some roasted garlic scones to contribute to the garlicy potluck, and they turned out to be a great success! I peeled two whole bulbs worth of garlic, submerged the cloves in canola oil, and roasted them in the oven for about an hour. By roasting garlic in oil, not only do you end up with roasted garlic, but also roasted garlic oil! 


I strained the roasted cloves out of the oil, mashed them up, and added them to my favorite scone recipe, which I've blogged about before (here). Below is the full recipe, which originally comes from Chef Jones, who taught pastry classes at the CIA:

20 oz. All Purpose Flour
1.25 oz. Baking Powder
6 oz. Butter
4 oz. Sugar
4 oz. Milk (maybe more)
2 Eggs (okay to use extra milk instead of eggs)
pinch salt

Start with cold butter and cut it into the flour and baking power - mix just until everything is evenly combined, you don't want the butter to melt! (see my previous post for my favorite method for cutting butter into flour).

In a separate bowl combine the sugar, milk, eggs, salt, and any other ingredients (i.e. roasted garlic, fruits, nuts, etc.). The original recipe says to mix these together until it has a "shiny" consistency... I've never quite figured out what this means, just thoroughly mix these ingredients together! Also, I sometimes add an extra splash of milk if all the dry bits are not getting moistened.

Then mix the wet stuff into the dry stuff, being careful to just combine these and not over-mix it. You want an even consistency without kneading the dough too much - the more you knead it, the tougher your end product will be. I like to rigorously mix everything together with a fork, then squeeze a handful of dough in my had to see how it holds together. If it falls apart easily, add another 2 oz. or so of milk and mix it in with the fork and do the squeeze test again. To avoid kneading, just press the entire dough together in the bowl, then flip the bowl over on a floured work surface so the dough falls out. Press the dough together in any places where it's crumbling apart, otherwise proceed with rolling out the dough!

As you roll out the dough, keep it moving to ensure it's not sticking to the surface. Roll it out to about 1/2inch thick and then cut out scones. The chef I got this recipe from always cut his into circles (using a circle cookie-cutter), but you can cut yours into whatever shape you want.

Bake at 350F until they are golden brown on the bottom (about 30 minutes?). 

After my garlicy scones came out of the oven, I tasted one and though it did not taste garlicy enough (or were my senses just saturated by garlic at that point?). Anyway, I brushed the top of each scone with garlic oil and sprinkled them with some Murray River Salt.


Tuesday, September 4, 2012

Salsa!

I wont lie, I've been a little intimated by the idea of making salsa. But I've gained a bit of confidence since moving back to California and devouring my friends salsa (he has joked about starting a salsa company called "Some White Guy's Salsa").  He just marinated and grilled a bunch of veggies and threw them in the blender. I tried to recreate his type salsa.

Fire Roasted Veggies on the Gas Stove!


Ingredients: Fire roasted pepper, tomato, onion, fresh tomato, fresh garlic, and cilantro

Blended ingredients are delicious on chips!

This salsa wasn't bad for a first attempt, but I've got some work to do. First, the color is awful. Second, the flavor wasn't quite right - maybe more tomatoes less peppers next time? Or more peppers, less tomatoes... hmmm.  Also, mixing this salsa with chopped avocados was awesome!

Wednesday, August 22, 2012

Fried Olives

Ladies and gentlemen, I am blogging in REAL TIME. Alex and I recently moved into a cute half-a-duplex in Berkeley, CA and it's taken us some time to acquire internet. So we've been relying heavily in our neighborhood businesses for internet access, coffee, beer, and food as we re-build our living space.

Paisan has been the other half of our home. They have internet access and they're open from 8:30am-9pm with everything from morning pastries to vermouth braised pork (OMG so amazing!). I want to be friends with all their servers and did I mention their food is INCREDIBLE and inspiring! Also they have a delicious IPA on tap (Green Flash IPA).  

But the reason I am blogging now is because I am eating the most amazing olives I have ever had. They are fried olives and they are amazing. It's like the next generation of hush puppies... I'm so blown away. Alex just said, "they're like popcorn shrimp, but tasty and not terrifying!"

mmmm fried olives!

Friday, August 10, 2012

An Edible Marriage

Well, since my last post I graduated college, got married, went on honeymoon, packed up my entire life, and moved to California where the new hubby and I have been in limbo for a few weeks between a storage unit and my dad's house. Needless to say, things have been a bit crazy...

Anyway, first things first - I must give props to the deliciousness that graced our wedding:


Edible Flower Bouquets - I wanted my bridesmaids and I to have completely edible bouquets, so I grew lots of edible flowers in my own yard, but ended up using flowers grown by the folks at Colinwood Farm.

Also, my friend Sarah figured out how to make roses out of bacon!! She put a dab of hot glue on a skewer, topped the glue with lettuce, and topped the lettuce with bacon baked in the shape of a rose bud. The glue gave the structure integrity while the lettuce acted as a barrier between bacon an glue. Brilliant!  While I was freaking out before the wedding, my bridesmaids assembled our bouquets with bacon roses, pea vines, bachelor buttons, squash blossoms, calendula, nasturtiums, and my favorite - columbine! Then immediately after the ceremony we chowed down.


Madres Catering - These ladies were an absolute pleasure to work with. They were totally chill and down for anything. They used local and/or organic produce and let us provide the meat and bread from our favorite folks at the farmers market (Skagit River Valley Ranch, Stokesberry Farms, and Tall Grass Bakery).  After our ceremony, we were greeted at our reception venue by Madres' lovely staff and a selection of appetizers. We chose to have a "heavy appetizer" style reception so our guests could be free to eat and drink as they please without having to conform to a set dinner plan. Here is our menu with pictures where I have them:

Salad Cups! 

Soup Shots 
Shots of zesty tomato soup that I found to be an important injection of calories between hugs and conversation!

Crostinis with:
Shredded chicken tinga
Roasted cumin mushrooms with parmesan
Dilled salmon

Polenta Triangles with Roast Tomato Chutney (so good!)

Bacon Wrapped Cesar Potatoes
Roast potatoes with Cesar dressing, wrapped in bacon (delicious!)

Sausage Bites with a Trio of Dips
Skagit Valley sweet and hot Italian sausages wrapped in pastry dough

Slider Bar:
Cuban pulled pork
Beef patties
Vegan roast veggies
Condiments
Tall Grass Bakery brioche or mutli-grain slider buns

NON-ALCOHOLIC BEVERAGES:
Heather's Groovy Drink Mix
(Heather is one of the owners of Madres, she is a wizard with a blender and whatever happens to be in season!)

ALCOHOLIC BEVERAGES:
Homebrew!
Made by me, Alex, and our friends!
(and supplemented with Elysian beer and Charles Shaw wine)

The only one not on the list is the beer we toasted with - a brew that Alex and I concocted together:
Lavender Ginger IPA
(Also Sarah designed this gorgeous drink menu!)

Trophy Cupcakes - Dessert was a couple hundred mini cupcakes of three different flavors: Snickerdoodle, Triple Chocolate, and Hummingbird (a more savory dessert cake made with banana, pineapple, and coconut).

In addition to Trophy cupcakes, Alex's sister made gluten-free vegan cupcakes ( you can see a few at the edges of the photo above, at the base of the tier).

T'was a delicious wedding indeed!


Thursday, February 9, 2012

Chocolate Salad Dressing

Two weekends ago I flew to California to interview at UC Berekeley for graduate school.  It was a whole big interview weekend that included a couple different options for touring the area. I opted for a food tour of Berkeley. Traveling from Seattle, which is currently in the throes of winter with little more to offer than kale and potatoes -- Berkeley felt like the future; I had traveled to summer in a strange and wonderful place with citrus in January! A woman at the farmers market was handing out blood-orange samples, which blew my mind and I decided I had to buy some.  Then there were mangoes; voluptuous, curvaceous, and sticky with ripe juices. I brought back as many as I could fit in my carry-on bag.

Somehow I got inspired to make a fruit salad with my mangoes and blood oranges. I whipped up a dressing with equal parts olive oil and canola oil (wishing in retrospect I had used camelina oil instead), raspberry vinegar, dutch cocoa powder, cinnamon, paprika, and salt.  I cut up the fruit, dressed it, and then sprinkled toasted coriander seeds on top. Best. Salad. Ever. I could definitely get used to living in Berkeley...


Wednesday, February 8, 2012

A Cast Iron Love Affair...

After destroying a high-end non-stick Scanpan, I started researching the original, indestructible, non-stick pan: cast iron. I started, as I often do, chatting with a salesperson at City Kitchens. He informed me that most, if not all of the modern non-stick surfaces are intended to be used with vegetable fats and repeated use with animal fat can actually degrade the non-stick surface. Considering that I cook daily with bacon grease, modern non-stick surfaces are clearly not for me.

So, cast iron. Something about the Lodge brand pans has never impressed me. They're bulky, pre-seasoned with who-knows-what, and their rough texture just doesn't seems very conducive to optimal non-stick. However Lodge is one of the few (American made) cast iron cookware companies that still exists... so I turned to eBay to find some quality old-fashioned cast iron from the early 1900's.

Griswold and Wagner were two American cast iron producers around the turn of the century. They were eventually bought in the 1950's and now you can apparently still find "Wagner" pans that are now made in China.  Both Wagner and Griswold pans gained a reputation of being high quality pans - they're light weight and forged in a way that maximizes non-stickness. Interestingly, Griswold pans are hot collectors items while Wagner pans go relatively unnoticed in the antique market.  This means it was relatively easy for me to find a prime-condition 10inch Wagner pan for about $30 (Whereas the exact same pan with a "Griswold" stamp might have cost at least $100... economics is silly).

As soon as I got my Wagner pan in the mail, I threw it in the oven to cook off the seasoning so that I could re-season it with bacon grease.  What is brilliant about this is that every morning when I cook bacon, I'm doing something good for my pan - whereas before I was just slowly killing my Scanpan with bacon.  It's funny how much better I feel about life knowing I'm being good to my cast iron pan and in return my cast iron pan is good to me.

The first thing I made was poutine. I fried french fries in my cast iron pan. Then poured off the excess grease, spread the french fries on the bottom of the pan, covered them with gravy and Golden Glen Farms cheese curds and then I put the whole thing in the oven until the cheese melted.


This pan made the best french fries I've ever had.  Needless to say, I'm totally head over heals in love with cast iron.