Showing posts with label Chocolate. Show all posts

Tuesday, June 10, 2014

Grill-Baked Double Chocolate Idiot Cake

My dad LOVES chocolate. Intense, bitter, extreme dark chocolate. So for his birthday I wanted to make him something extremely chocolately. Except I had a slight problem - our oven is on the fritz, so baking is out of the question... or is it?! One does not necessarily need an oven to bake. Humans were baking long before the conventional oven was invented, and even now some of us humans continue to bake over open flame and hot coals. 

I've never baked a cake on a grill before, so I searched the interwebs for a fool-proof chocolate cake recipe and decided on David Lebovitz's Chocolate Idiot Cake. This recipe claims to be idiot proof, which I thoroughly tested and confirmed. It's so simple, it only has four ingredients:

10 oz. Bittersweet Chocolate
7 oz. Unsalted Butter
5 large Eggs
1 cup Sugar

Get all the ingredients together and light up the grill.


Prepare a 9-inch spring-form pan by buttering it and then dusting it with cocoa powder. 


Wrap the pan in a single sheet of foil to protect the cake from the water-bath that it will ultimately be cooked in (this isn't necessary if you are not using a springform pan). 


My foil wasn't large enough to cover the entire pan with one piece, so I tried using two pieces. It seemed to work at first, but later on when the cake was nearly finished, I noticed some water hanging out with the cake inside the pan. I panicked. My cake was swimming! It was clearly ruined! ...or was it? I simply dumped the water off the cake and put it back on the grill to dry off a little, finish baking, and in the end it was like nothing happened. After that catastrophe, I was convinced - this recipe really is idiot-proof!

I'm getting ahead of myself... to make the cake, begin by roughly chopping the chocolate into chunks, cut the butter into a few pieces, and then melt the butter and chocolate together in a double boiler. Choose your chocolate carefully as this is the primary flavor of this cake. I used Scharffenberger 99% unsweetened baking chocolate, plus a few Guittard semisweet chocolate chips because I didn't have quite enough Schrffenberger on hand.


Whisk together the eggs and sugar in a large bowl.


When the chocolate is completely melted, whisk it into the eggs and sugar.


Put the batter into the prepped pan and then place the whole thing in a larger pan.


By now the coals should be ready. Divide them onto two sides of the grill like this:


Put the cake on the grill and add water to to the outer pan until it's about half-way up the edge of the cake pan. I also moved our oven thermometer out to the grill to make sure it wasn't getting too hot. The original recipe says to bake at 350F. Surprisingly it remained around 300-350 the entire time.


Either cover the cake with foil, or put a lid on it. Then close the grill and let it bake for about an hour.


Check it every 20-30 minutes, and more frequently once it's getting close to done. It's done when a toothpick or knife can be inserted and cleanly removed from the cake. About 30minutes into baking I added a few pieces of charcoal. ...I also made dinner on the grill while the cake baked. Mmmm whiskey-maple sausage!


 The finished cake wasn't the most glamorous cake I've ever seen...


...but luckily I had some chocolate ganache in my freezer (left over from Chocolate Macarons) that I melted and used as frosting. 


In the end, this cake was INTENSE. Somewhere between a dense mousse and a silky fudge - chocolate perfection.


Tuesday, January 21, 2014

Honey Chocolate Peanut-butter Banana

Another Alex creation. This is a common late night snack for him, long after I've gone to bed. He graciously recreated this midnight ritual during the harsh light of day and he even aloud me to document the entire process. So here it is for your enjoyment and inspiration - Alex's late night goop of marvelous deliciousness!

Forage the wild kitchen for the elusive banana!


Prepare a bowl with several scoops of peanut butter.


...and get some chocolate chips and honey nearby.


Peel the banana while butter melts on the stove, then slice the banana into the butter and fry it.


Gently flip these delicate morsels with a spoon and continue to fry just until they begin to have the slightest amount of color on them.


Transfer the fried banana to the peanut butter bowl and immediately add chocolate chips and honey.


Notice how the chocolate chips melt into the hot fried banana. Mmmmmmm.


The next part is critical, and Alex assured me that any photo would surely be disgusting.


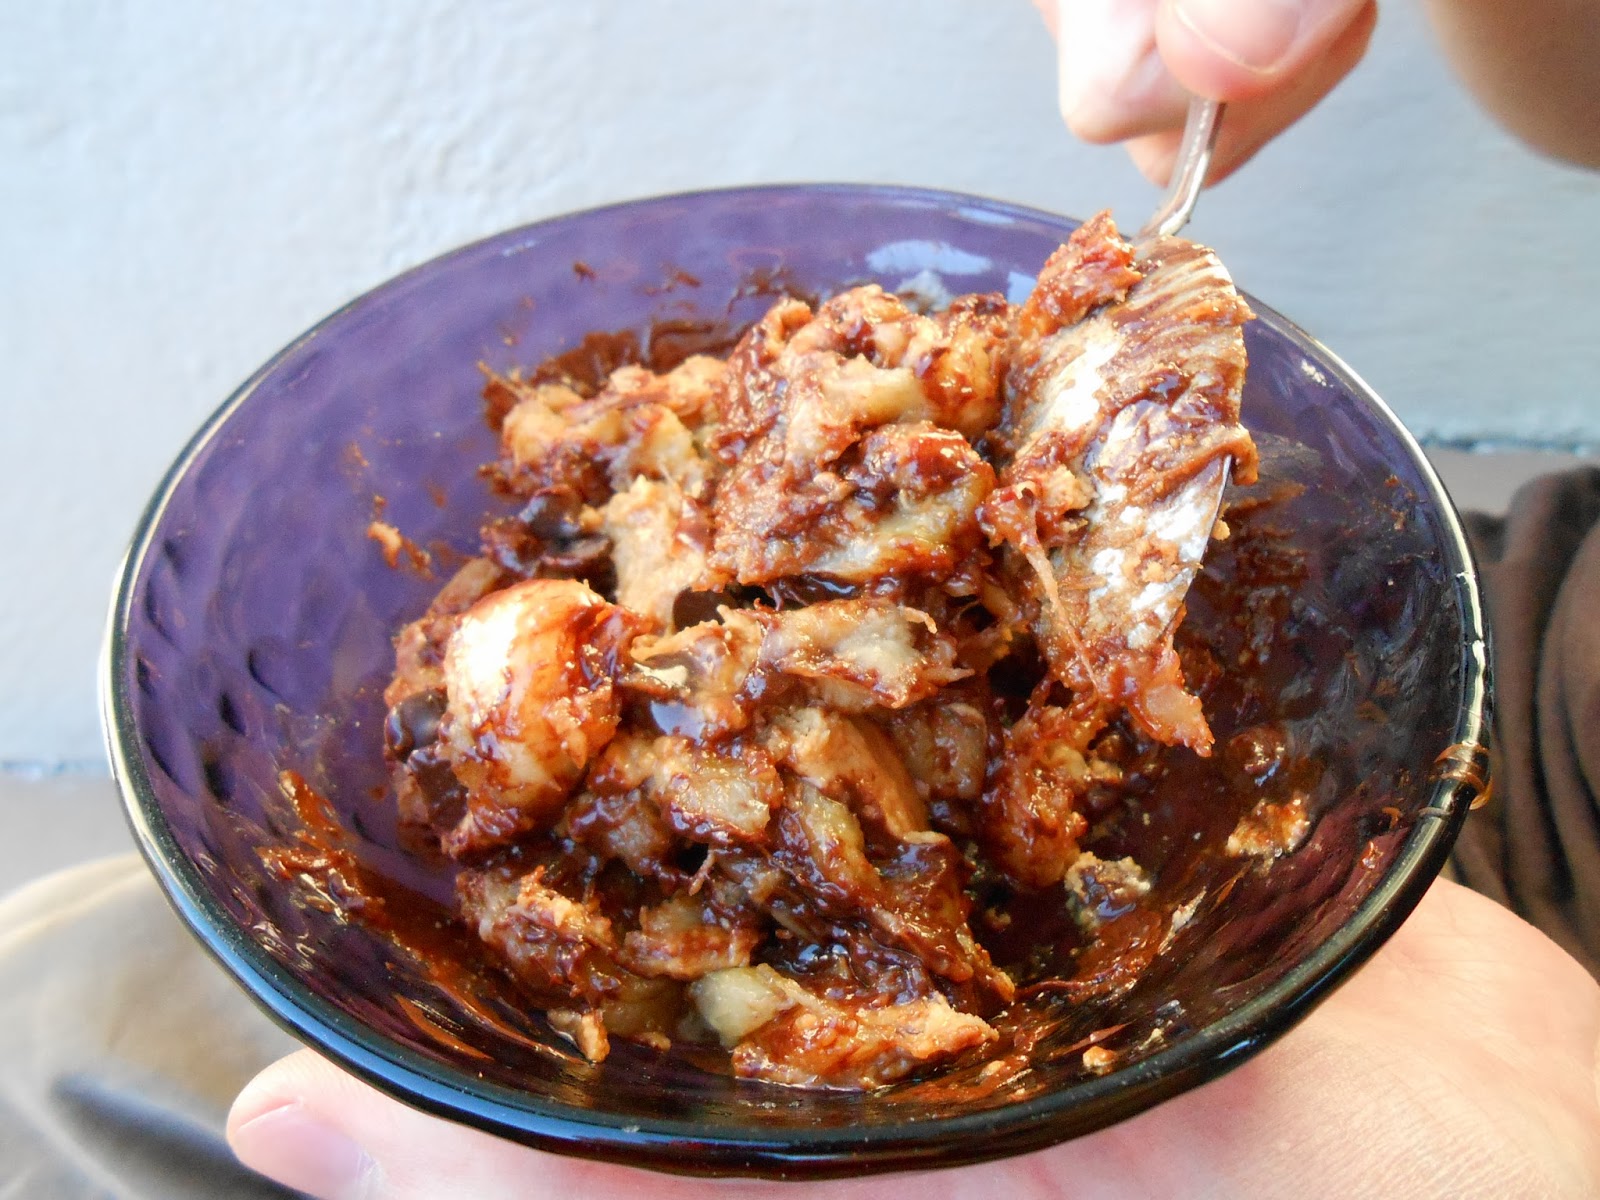
Once the chocolate chips are melted, mix everything together with a spoon, and enjoy.


I think it's actually rather beautiful. A complex landscape of peanut, chocolate, honey, and banana!

Sunday, November 3, 2013

Om's Chocolate Cake

I believe it was my brother who gave this cake it's name. Our mom made this cake for birthdays and occasionally other special occasions when we were kids. Under all other circumstances we called our mom, "mom", but when referencing this cake, it's not "mom's chocolate cake", it's "om's chocolate cake". It's pretty much the best cake ever, though I suppose I'm rather biased on this topic.

My mom's recipe is actually a photocopy of a recipe from a old Sunset Magazine, with a few hand-written modifications.


The original recipe is titled Almond Fudge Torte, and says it serves about 10 people.

Om's Chocolate Cake
2 tsp Fresh Brewed Coffee
4 oz. Bittersweet Chocolate
3 Large Eggs
1/2 cup (1 stick) Unsalted Butter
3/4 cup Sugar
2 oz. Almond Paste
1/2 cup Flour

My mom always used Ghirardelli Extra Bittersweet Baking Chocolate, I ended up using a combination of Scharffen Berger 99% chocolate and Guittard semisweet chocolate chips. This cake is all about intense chocolateliness, I say the higher concentration of cacao, the better!


Preheat the oven to 350F. Melt the chocolate in a double boiler, and make some coffee. When the chocolate is melted, mix 2 Tbsp of coffee into the chocolate.


While chocolate is melting and coffee is brewing, cream together the butter and sugar. Make sure the butter is at room temperature first, it'll make your life a lot easier. If your butter is cold, you can cut it up into many pieces so it will warm up quickly.


Add almond paste to the creamed butter and sugar...


Separate the eggs - whites in a new mixing bowl, yolks in with the butter-sugar-almond paste.


Add the coffee-chocolate to the butter-sugar-almond paste-egg yolk. Also add the flour and thoroughly mix.


Beat the egg whites to stiff peaks.


Shout out to my trusty vintage Hobart-Kitchen Aid mixer and egg beater that I inherited from my mom when she moved back east to be near the grand kids, et al.

Fold the egg whites into all the other stuff in three parts, being careful not to over mix.


 Butter an 8-inch cake pan and dust it with cocoa powder.


Pour the batter into the pan...


Bake at 350F for 30min. Do not overbake! This cake is better underdone than overdone!


Let cool on a rack for about 10 minutes.


Tap out of the pan onto the rack once it's cool enough to touch and let it continue to cool completely before making the chocolate glaze.


Chocolate Glaze
2 Tbsp Unsalted Butter
4 oz. Bittersweet Chocolate


Once the cake is cool, melt the chocolate with the butter on a double boiler. Mix the butter and chocolate together thoroughly. Once fully melted, remove the buttery chocolate from the heat and allow it to cool, stirring occasionally. Let it cool until it's thick and almost solid. Position a chinoise, cheesecloth, or any other fine mesh over the cake and pour the chocolate glaze through it. Keep the cake on the cooling rack for this and put something under it to catch drips. It helps to have a second person help you with this.


Use a spatula to evenly spread the glaze over the cake and down the sides. Then get busy eating all the chocolate off the spatula, strainer, bowls, and anywhere else it might have splattered! I have many fond childhood memories of "helping" my mom clean up from making this cake. 


Allow the glaze to fully harden before serving. This can take several hours at room temperature, or roughly 30 minutes in the fridge. Once the glaze is solid, it's ready to be served, or adorned with additional decorations. 

I made this cake after getting some totally unexpected, incredibly bad news. I was craving a serious cooking project and some serious comfort food. Also I felt the need to express my frustration with several horrible things that have happened to my close friends this year. Also lots of pink edible sparkles. Because everything is better with sparkles. Let's all love each other and live awesome lives no matter what. And if we eat enough cake, we just might poop sparkles. 


Sunday, April 28, 2013

Chocolate Parisian Macarons

After making ice cream last week, I had egg whites left over. Instead of using them in something easy that I'd done before (like meringues or pancakes), I decided to make macarons. I thought, "how hard can it be? it's just two meringues with some frosting in the middle, right?" I wasn't entirely wrong, though macarons are a beast all their own. My first clue that I was getting in to something complicated was when I realized my entire cookbook-bookcase did not have a single recipe for Parisian macarons. Then searching the internet yielded relatively few results, and several bloggers warning fellow foodies of the subtleties in the technique for making macarons. I decided to follow the advice of David Lebovitz. Here is his recipe (doubled):

Chocolate Macaron Batter
2 cups Powdered Sugar
1 cup Almond Flour
6 Tbsp Dutch Cocoa Powder
4 Large Egg Whites
1/2 cup + 2 Tbsp Granulated Sugar

First take the egg whites out of the fridge so they can warm up to room temperature, and preheat the oven to 350F.


Almond meal or even almonds ground up in a food processor will work if you can't find almond flour. Sift the Powdered Sugar, Almond Flour, and Cocoa Powder into a bowl. 


I used Bob's Red Mill Almond Flour, which contained some bits that were impossible to work through the mesh strainer that I use as a sifter.


So I used a coffee grinder to grind up the bits that refused to go through the mesh, after which, they went through just fine.


Next I started whipping the egg whites in my trusty vintage Hobart-Kitchen-Aid mixer.


While the eggs whipped, I got a few things ready: a half-sheet-pan with a Silpat (parchment paper can be used if you don't have a Silpat), and piping bag.


When the eggs had reached the stage of soft peaks, I started to slowly add the granulated sugar.


Let the eggs and sugar beat together on high speed for a few minutes until stiff.


Then start to gently fold in the powdered-sugar/almond-flour mixture in two parts.


Now you're ready to start piping! Here are a few tricks to make your life easier:

1) Plug up the tip by stuffing some of the pastry bag into it. This way you wont have batter oozing out the end  as you're trying to fill it.


2) Make a "C" with your non-dominant hand and fold the pastry bag over your hand, so you can hold the bag as you fill it, and then you can use your "C"-hand as a ridged surface to scrape the spatula against -- keeping everything neat and tidy, inside the pastry bag!


When the bag is full, twist off the top so it's tight, then unplug the tip and start piping!


For macarons, I pipe perpendicular to the pan.


My piping skills are far from excellent...


I let these bake for 15 minutes in the middle of the oven, then I rotated them and let them bake for a few more minutes before taking them out to cool.


While my macaron cookies cooled, I worked on the filling:

Chocolate Ganache
1/2 Cup Heavy Cream
2 tsp Honey
4 oz. Bittersweet Chocolate
1 Tbsp Unsalted Butter

This isn't exactly the recipe I used, but rather the recipe I should have used. I doubled this recipe and ended up with way too much left-over ganache (mmmm left-over ganache!). Also, I used unsweetened chocolate, which meant I ended up throwing in a handful of sugar, some extra honey, and a splash of vanilla to make it edible. All of this, plus my lack of diligent stirring while I was trying to take sexy action photos for this blog post lead to a broken ganache - meaning the fat separated out resulting in a grainy chocolate lumps drenched in greasy fat. I was able to mostly rescue the ganache by taking out a a few tablespoons, re-melting it, stirring like crazy, then adding this back to the broken ganache and stirring like crazy again. Lesson learned - when making ganache, stir like crazy until you're absolutely certain it's stable!

Anyway, here's how to make ganache: Chop up the chocolate.


Bring the cream and honey to a boil, then turn off the heat and add the chocolate.


Let it sit for a few minutes, then stir the chocolate, milk and honey together.


Then add the butter. (you can begin to see the grainy/broken texture of my ganache here!)

STIIIIRRRR!!! Here's my ganache after I saved it from breaking:


Once the ganache is completely cooled, I spread it between two cookies to make a macaron!


These little guys aren't perfect, but they sure are deliciously chocolatey!