Showing posts with label Beef. Show all posts

Thursday, August 14, 2014

Mom's Spaghetti and Meatballs

I had this idea for a cooking project that I affectionately refer to as Balls of the World! The original plan was to make a flight of meatballs, featuring traditional meatballs from across the globe. However this would inevitably result in an incredible amount of meatballs - I would either have to organize a meatball party, or Alex and I would be eating nothing but meatballs for weeks. These things may still happen, but in the mean time, I think I'll explore the vast world of spherical meats one at a time, and what better place to start than the traditional meatballs of my family - my mom's meatballs.

Pasta was the staple food at my mom's house when I was growing up. Often just plain pasta with parmesan, sometimes with broccoli. Every couple of weeks though, my mom would get fancy and make meatballs and tomato sauce. I have fond memories of these meatballs adorning our daily pasta and of course there was the excitement of patiently watching/smelling/hearing the meatballs cook at the back of the stove.

Mom's Meatballs
Ground Beef
Diced Onion
Diced Carrot
Bread Crumbs
Egg
Oregano
Salt & Pepper


To be honest, I just made up this recipe from memory with a few modifications. I'm pretty sure my mom used dried oregano and far less onions and carrots than I did. In the picture above, I used 1# beef, 1/2 onion, 1 small carrot, and a few sprigs of oregano fresh from my garden. I also used cornmeal because I was all out of breadcrumbs. My mom used to grind up stale sandwich bread in her food processor and then save the crumbs in a gallon ziplock bag in the freezer for later use in meatballs or other things. So, these aren't exactly my mom's meatballs, but I'm inclined to say they're close enough.


What defines these meatballs for me is that they're cooked in the tomato sauce. You can get the tomato sauce going before or after mixing and forming the meatballs.

Mom's Tomato Sauce
Diced Onion
Canned Tomatoes
Tomato Paste
Salt & Pepper


Sauté the onions just until they're translucent. Then add two large cans of tomatoes and a small can of tomato paste. Rinse out the cans with a little bit of water and add that too.


Canned tomatoes come in many shapes (diced, whole, crushed...), any will do. If you're working with whole tomatoes, you can squish them against the side of the pot with a spoon. Or my favorite method is to first pour the whole tomatoes into a bowl and squish them with my bare (clean) hands. 


Bring the sauce up to a simmer and then add the meatballs to it.


Make sure to stir often to keep the sauce from burning on the bottom. After adding the meatballs, start cooking some spaghetti.


When the spaghetti is al dente, strain it and serve it with meatballs and sauce on top. Ideally sprinkled with parmesan cheese too.


It was fascinating what strong memories this brought back for both me and Alex. I imagine that most people who grew up in the US have a childhood connection to classic spaghetti and meatballs. Alex exclaimed a few bites in that this is the ultimate comfort food. I wasn't so sure, for me this was one of those kid foods that just doesn't have the same magic as an adult. If I were to make this again, I would at least add garlic and omit the tomato paste in the sauce. Really, this dish is a blank canvass ready for herbs (oregano, thyme, rosemary, sage, chives, cilantro, parsley, basil...), cheeses (fresh cheeses, salted and aged cheeses, maybe even some stinky blue cheeses), and vegetables (fresh tomatoes, carrots, eggplant, summer squash, corn, mushrooms, peppers...).


Monday, July 21, 2014

Grill-baked Beef Pot Pie

This past weekend, Alex and I went to hear one of my coworkers play flute in a terrific production of Sweeney Todd at the Ohlone College outdoor amphitheater. Part of the concessions was Mrs. Mooney's Pie Shop (competitor of Mrs. Lovett's pie shop), where the audience could purchase real meat pies to eat while watching the play - such a hilariously dark addition to the whole experience! Presumably the pies were made with beef, not cat or human. Unfortunately though, they sold out before we could get our hands on a meat pie, so we left feeling slightly unsatisfied and in need of a good meat pie. Perhaps something a bit better than the worst pies in London.

I started making pie before I realized that we've been fabulously procrastinating at contacting our landlord about our broken oven. So, another baking-on-the-grill adventure!

There are a couple moving parts, so here's an outline:

1) Make the filling, let it stew while prepping everything else
2) Make the dough, put half in the fridge and roll out the other half for the bottom of the pie
3) Fire the grill!
4) Bake the bottom of the pie on the grill
5) Roll out the pie top while the bottom is cooking
6) Finish the filling
7) Assemble the pie and bake it on the grill


The Filling: onion, garlic, carrot, 1.25# Prather Ranch sirloin tip beef, and a few sprigs of rosemary and thyme.


Sear the beef in butter on high heat. Don't move it around too much - let it sit to get nice and brown. Color is flavor!


Once the meat is good and brown and there's a layer sticking to the bottom of the pan - use a splash of water (or wine) to deglaze the pan, then add the onions, carrots, and garlic.


Sauté the veggies for a couple minutes, then add enough beef stock to just barely cover everything. Chop up the herbs and add them too.


Turn the heat down to low and put a lid on the stew - let it simmer until the meat is easily cut with a spoon.

Meanwhile - make the dough!

Basic Pie Dough
12oz. Flour
8oz. Butter
4oz. Water
pinch salt

I begin by measuring out the water and then putting it in the freezer while I deal with the butter and flour. I use frozen unsalted butter (European style is always better because it has more fat, and fat is flavor!). Cut the butter into small cubes, roughly 5mm cubed. Then use your fingers to squish the butter into the flour (this is my favorite part!). You can also use a food processor or pastry cutter to cut the butter into the flour, but I feel like I have an intimate connection with my dough if I truly make it by hand. I know instantly if it's getting too warm (the butter begins to feel oily) or precisely when it's done (an even, flakey texture). If the butter starts to feel oily, simply but the bowl in the freezer for a few minutes before continuing.

Add the water and mix it in with a fork. Once the water seems roughly evenly incorporated, squish the dough with your hand - if it easily coalesces into a ball of dough that's not overly sticky, it's good. If it's incredibly dry and refuses to make a single ball of dough - add a tiny bit more water, maybe an ounce or a half-ounce at a time. If it's incredibly sticky - add a little bit of flour until it's easy to work with (i.e. not sticking hopelessly to everything).

Roll out one half of the dough on a well floured surface. Flour the top of the dough, and keep the dough moving - meaning shift it around in between rolls to ensure it's not sticking on the bottom. Roll it out until it's larger than your pie pan by at least an inch.  


You can use your rolling pin to help you transfer the dough into the pie pan without it tearing - roll the dough around the rolling pin like a scroll, then lift it up and un-roll it over the pie pan.


Gently pat it into the pan and trim the edges with a knife, then plastic wrap all the extra dough (including the other half) and set it aside in the fridge.


Start some charcoal and spread the hot coals out in a circle around the edge of the grill. This will keep your pie from burning on the bottom.


Put some sort of weight on top of the pie crust so it doesn't bubble up as it cooks. You could use just about anything for this: dried beans, a slightly smaller pie pan, gravel inside of foil, an oven-proof plate, specialty metal weights...


Let the crust cook for about 10-20 minutes just until it barely begins to look golden.


While the crust cooks, check on the stew. Make sure there's still a little bit of liquid (add water or stock if you need to), then add a few pinches of flour to make it into a thick sauce. Let it cook for a few more minutes, and then season to taste with salt and pepper.

Also while the bottom-crust is on the grill - roll out the top crust. Then once the bottom-crust is ready, fill it with the filling and top it with the top crust.


Lay the dough on top, trim the edges, and cut a few steam holes in the top. You could get fancy with the edges, but it's not necessary. 


Cut up the left over bits of dough and sprinkle them with cinnamon and sugar (or whatever you want), then let everything bake on the grill for roughly an hour until the edges are browned.


I doubt the top of the pie would ever get very brown using this method. Kate McDermott suggests using a dutch oven, with coals on top of the lid to get ample heat from above.


Tuesday, July 9, 2013

Lettuce Cups

The first time I ever had lettuce cups was in high school when my buddies came to my cafe job as I was closing up the shop. They had arm-fulls of take-out from Garden Fresh and insisted that I stop everything and try the lettuce cups. They were amazing. A medley of deliciousness, delivered to the mouth via lettuce in hand. They transported me to another dimension where everything was lettuce cups, and everything was awesome. Somehow, those lettuce cups were so distracting that I walked away from the cafe that night with lights on and doors unlocked - I was shocked my boss didn't fire me for a careless teenage stunt like that, but thankfully, he didn't.

For some reason, I never really considered making lettuce cups myself. They were some sort of untouchable magic that only Garden Fresh was capable of. Then Alex decided to take the initiative to make lettuce cups a reality.

Lettuce Cups
Bibb Lettuce
......
Ground Beef
Garlic
Onion
Carrot
Sweet Peppers
Olive Oil
......
Chopped Fennel Greens
Dry Ground Fennel
Coriander
Berbere
Tumeric
Black Pepper
Red Pepper Flakes
Salt


Cut everything into a small dice. Saute the beef and veggies in olive oil until cooked and season with the fennel greens and spices.


Serve inside of bibb lettuce leaves and eat them with your hands (like a taco)!

Sunday, July 7, 2013

Meatballs & Yogurt Sauce

My camera has sadly passed on to silicon heaven. Luckily, my iPhone has a surprisingly decent camera, so here's a post made entirely of iPhone photos!

It's been heating up here in the Bay Area, and the other evening Alex and I crafted a quick and (mostly) cool dinner. Alex made a yogurt sauce...

Strauss Plain Yogurt with hella chopped garlic!


The spice line-up for the yogurt:
Coriander, Red Pepper, Tumeric, Cinnamon, Cumin...

Garlic, Yogurt, Spices, Olive Oil...

Chopped tomatoes and cucumber to finish the yogurt sauce

...In the end, perhaps the yogurt sauce was more like a saucy tomato-cucumber salad. Anyway, moving on to the meatballs:

Ground beef, chopped garlic, corn meal, cilantro, cumin, paprika, salt.

My favorite part is mushing all the meatball ingredients together with my hands! Also, we were all out of both flour and eggs, so I improvised with cornmeal and completely left out the egg. Turns out eggs are totally unnecessary for meatballs.


Searing the meatballs in olive oil

Meatballs with Cucumber-Tomato-Yogurt Sauce, garnished with Green Onion.

Wednesday, May 1, 2013

Basil-Cilantro Pesto, Beef, and Strawberries

Beef and strawberries, and strawberries and herbs, and beef and herbs, and strawberries and beef and herbs are all magical combinations.

I made some pesto with a bunch of cilantro, two bunches of basil, and enough olive oil to make it saucy:


Then I sauteed ground beef, onions, garlic, and zucchini.


I turned off the heat and added asparagus...


In a seperate pan, I warmed the pesto, then combined it with the beef saute.

Pesto beef & veggies with brown rice and strawberries

Thursday, April 11, 2013

Orange-Fennel Beef & Rice

Today's post is brought to you by the color orange!


...Also the fruit, orange. I started out with with vague idea of orange & beef and rice-based one-pot meals like jambalaya or paella. I was also excited to use these super flavorful, extremely colorful carrots we got at the farmers market!


On the stove, I began by browning some ground beef.


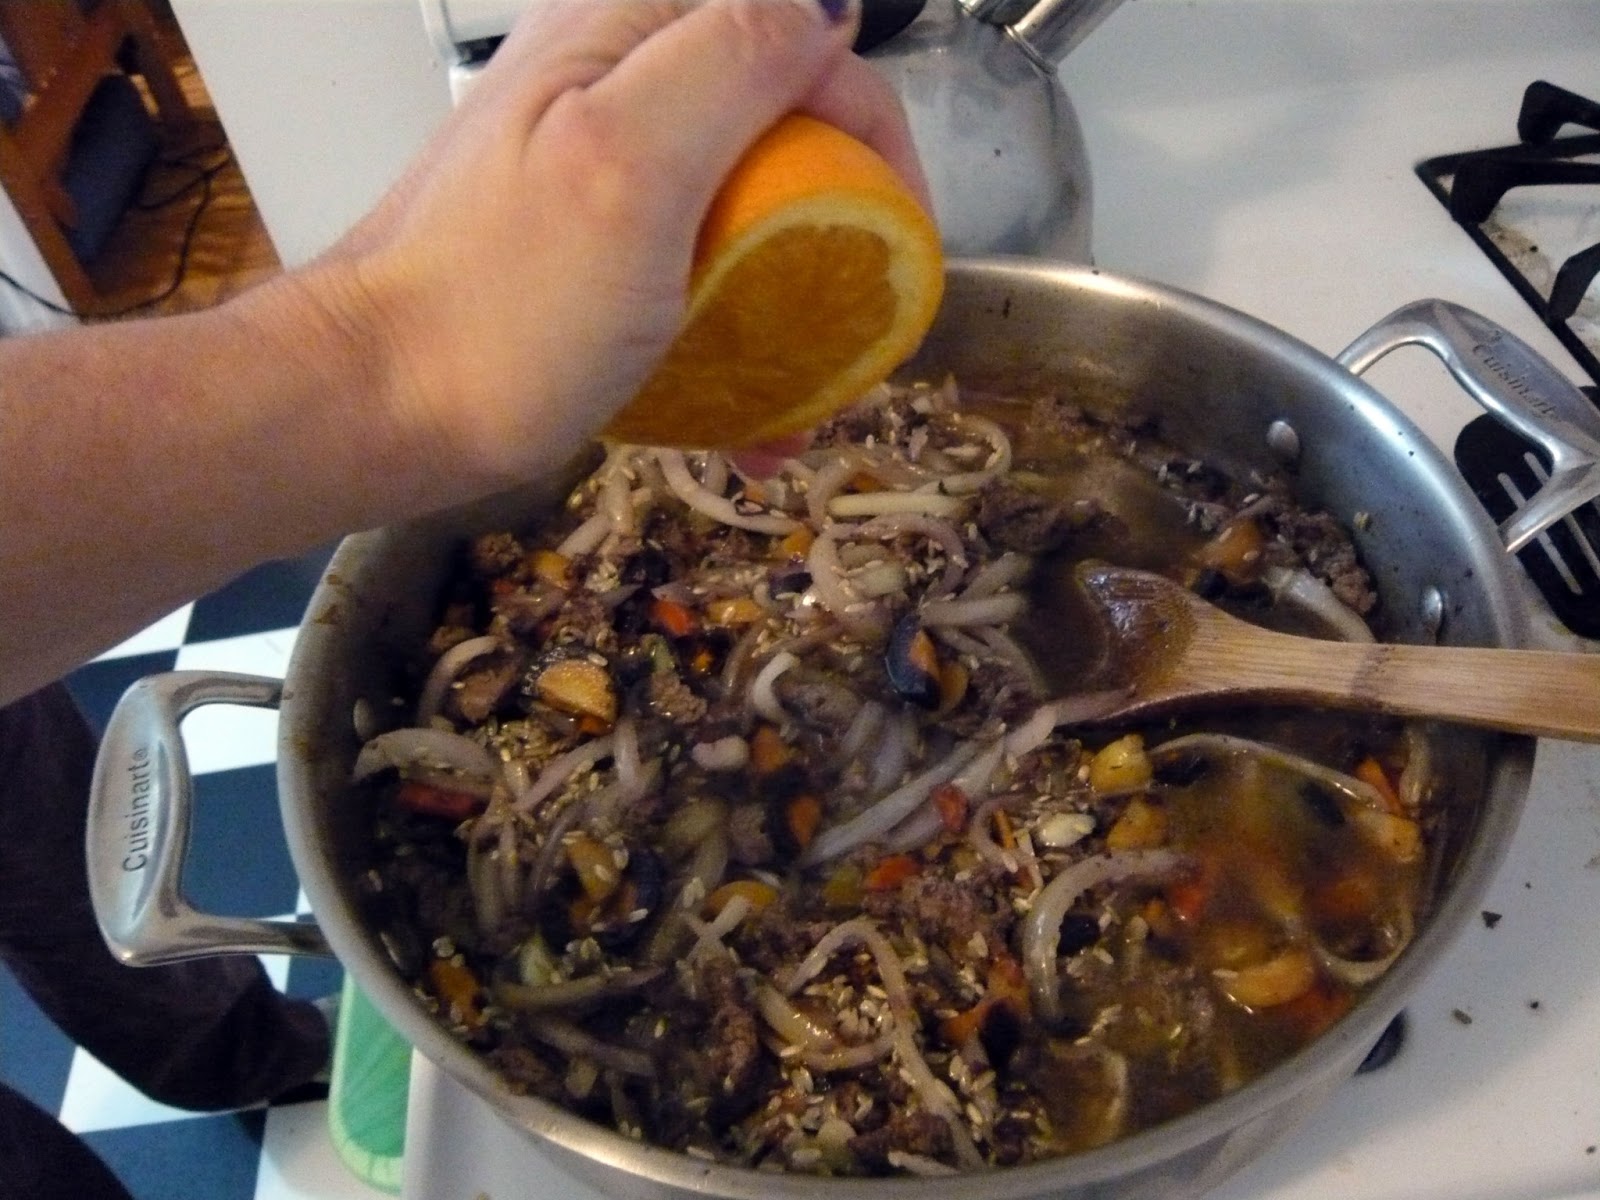
Then I added onions, carrots, and garlic. Sauteed these all together until they were beginning to brown. I quickly added a cup of rice, stirred it in, and de-glazed the pan with two cups of water. Then I added both juice and zest from one orange... 


And some freshly grated nutmeg.


I let this all simmer until the rice was tender and the liquid was nearly gone (As it cooked I keept an eye on it to make sure it always had plenty of liquid, adding water as needed). When the rice was tender, the flavor still wasn't quite right. So I grabbed Alex to get his opinion. He had the brilliant idea of dried fennel, maybe a teaspoon or so. Then we added a dash of cumin, salt, and cilantro and ended up with a fruity delicious beefy rice dish!


Monday, October 15, 2012

You don't need no teef to eat this beef!


The man at Fallon Hills Ranch has been trying hard to sell us a brisket at the farmers market every Sunday. A whole brisket is quite a commitment, but a few weeks ago, he had half-briskets and we decided to go for it. Alex did a bunch of research on traditional Texan barbecue and then spent a day while he worked from home making this incredible BBQ brisket!

It began with a dry rub the night before:


The Rub
2 Tbsp Roasted Ground Cumin
1 Tbsp Spanish Sweet Paprika
1 Tbsp California Paprika
1 Tbsp Hungarian Sweet Paprika
1 Roasted Dry Ancho Pepper (stem and seeds removed)
1 Tbsp Crushed Red Pepper
1/2 tsp Mace
1 Tbsp Alaea Hawaiian Salt
1 Tbsp Salish Smoked Salt
2 Tbsp Black Pepper

Grind everything above in a coffee grinder without cleaning any residual coffee grounds out of the grinder! Then add a whole bulb of chopped garlic to the ground spice mix and rub it in to the meat. The rubbed meat sat in the fridge for 11 hours, and then moved to the counter to warm up to room temperature for about 2 hours. Sear the meat in a cast iron pan with a sliced onion. Remove the meat from the pan when it's good and brown and place it fat-side-down in a tagine (or dutch oven). Let the onions caramelize in the cast iron pan and then add the sauce mixture below. Cook the sauce for about five minutes and then pour it over the seared brisket.


The Sauce
2 Tbsp Worcestershire Sauce
1/4 Cup Apple Cider Vinegar
1/4 Cup Bragg's Liquid Aminos
1/4 Cup Black Coffee
1/4 Cup Sugar
1 Tbsp Molasses
1/2 Cup Water
1 Shot Jameson Irish Whiskey
1 Tbsp Garlic Powder
1/2 Cup Rub (see above)

Cook the brisket for 6 hours in a 250F oven. Take the brisket out of the sauce to let it rest while you make the rest of the sauce. Use an immersion blender (or a normal blender) to blend the sauce with 2 large tomatoes, about a teaspoon of fresh ginger, juice from half a lemon, and a tablespoon of yellow mustard seeds. Then cook the sauce on the stove for about an hour until it's thick. Pour the sauce over the brisket and it's ready to eat!

I whipped up some cornbread and a slaw out the veggies we had in the fridge - carrots and poblano peppers. I grated the carrots and peppers, chopped some cilantro, and mixed it all up with  big splash of apple cider vinegar, a few scoops of mayonnaise, and a dash of cumin, paprika, and salt.

Alex made Black & Tans by mixing 1:1 Peregrin Pilsner and Sierra Nevada Porter.  Supposedly you can get the porter to float on top of the pilsner if you pour it over the back of a spoon into the glass... we didn't have much luck with this, perhaps the density of the beers we used was not right. Either way, it was darn tasty!


 When all was said and done we had a fabulous BBQ dinner!


And Alex even paired the meal with some music from Reverend Payton's Big Damn Band: